Slime is probably the most annoying thing you can find inside your bike tire. But did you know it can also be damaging to your bike’s rim and wheels? Not only is slime unsightly, but it can cause a dangerous condition known as “rim blow out.” It also makes it more difficult to mount and remove your rim from your wheel. Here’s how to remove slime from inside a tire.

You know those really big, gaping holes in your bicycle tires? The ones that are really hard to patch and have you feeling like your bike is going to fall apart any second? Well, they’re no match for slime! Slime infuses your tires with a substance that makes it easy to pump them up again and get back on the road — but what if you need urgent slime removal? You can’t always rely on household cleaners. It’s important that you know how to remove slime from inside a tire the right way!
If you want to know the 3 types of tires, check out this “Tubular vs. Clincher vs. Tubeless” article.
In the past few years, bike tires have become almost as important as the wheels themselves. What was once an afterthought is now viewed as an absolute necessity. Slime — what was once a children’s toy (sorry, I’m talking about a different slime here) — has now become an essential component of any bike aficionado’s day-to-day routine. Not only does slime keep your tires from being damaged, but it also helps to preserve your tire and make it last longer.
So, have you ever tried removing slime from your tire? It’s not the easiest thing to do. Slime can really get stuck in there, and as someone who has struggled with this issue before, I can tell you that it is maddening. But just what do you need to do to remove slime from your tires in no time?
Those of you who have ever had to remove an unwanted slime from your bicycle tires will know that it is a messy affair. Slime is the most difficult substance to remove from your bicycle tires, so if you happen to have put too much slime on your bicycle tire and need urgent help with slime removal, we’re here to help!
Follow our simple steps and learn how to remove slime from inside a tire in just a few minutes.
How to Remove Slime from Inside a Tire
Follow the simple steps below to learn how to remove slime from inside a tire. If you want to make sure that the process is complete, don’t skip any steps in the process, and always be careful with what you are doing. If something doesn’t seem right to you, consult someone who is experienced with tire repair and slime removal.
1. Make Sure the Rim and Tire are Cleaned Properly
Before you even begin to think about removing slime from inside the tire, you’ll want to make sure you have the proper tools and equipment. You can begin by cleaning off all of the grime and dirt that has accumulated over time. Dry rags will be most helpful in this regard.
To clean a dirty tire and rim, you should use a dry rag or paper towel. First, clean the rim with the rag and if you’re feeling particularly ambitious, remove the tire from the rim and give it a good wipe down as well.
And then, bring out the big guns. Pour a generous amount of soap and water into a spray bottle and give the desired area a healthy dose of the mixture. Soak up the excess liquid with a dry cloth, then use a cloth to wipe the surface.
See to it that the rims are completely dry after you’ve cleaned them. You don’t want anything happening to your rims!
2. Separate the Rim from the Tire
The next step on how to remove slime from inside a tire is to separate the rim from the tire. Slime is what keeps the tire attached to the rim, so in order to successfully remove it, we’ll have to detach the two together very carefully.
So, you’ll want to stand the tire upright on the ground (this will be tricky so get someone to help you), and then locate the valve stem. It’s located on the inside of the tire. If you have a Presta valve, it’ll be smaller than a Schrader and will have a removable cap to reveal the valve stem. At this point, press down on the side of the tire, and then you can open the rim very easily to loosen any dirt or debris that may be stuck in there
A slow and steady hand is the key to a successful tire-rim separation. Starting on one side, gently and slowly take the tire out of the sidewall. Do the same on the other side. Don’t rush or the rims or/and tires might end up getting damaged.
If you find this process not that quick and easy, there might be a tool you can use from a multi-tool to help you do this. If you don’t have a multi-tool, it’s a very handy tool and we really suggest you get one. Check out our recommendations for some of the best bike multi-tools.
3. Remove the Remaining Slime
After you’ve taken off the tire, you’ll be left with a rim covered in slime. You’ll need to clean away most of it. You’ll see parts of slime clinging to the tire and the edge of the rim, so make sure that they are wiped off completely.
It is normal for your tires to produce excess amounts of slime if you don’t ride them often, but it can cause one hell of a lot of trouble. Not only does it destroy the inner tube, but it can cause permanent damage to the rim and even disable the wheel’s steam valve. So if you don’t want this to happen, simply squirt some water on the slimed area. Then, use a dry cloth to wipe the slime away.
For best results, you can use warm water and a little detergent. Spray some water onto the cloth as well, so that the detergent can be more easily spread over the rim.
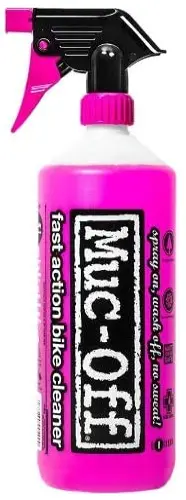
Muc-Off MOX-904 Nano Tech Bike Cleaner
With a Nano Technology formula, the Muc-Off MOX-904 Nano Tech Bike Cleaner is able to break down dirt and grime on microscopic levels without harming your bike’s delicate finish. It’s 100% biodegradable. It allows you to clean your bike without using harmful CFCs, solvents, or acids.
4. Allow the Components to Dry Out
Assuming you’ve removed all the slime from the tires and washed all the dust off, the next step is to dry out the components. If you can leave the parts out in the garage for three days, that would be great. This gives them time to soak up the heat — the best way to dry them out. When there’s no moisture left on the components, they’ll be ready for the next slime removal step.
5. For Stubborn Slime, Use a Slime Remover
Not sure how to get that slime off your components? If you’ve tried everything but still can’t see a way out, try this slime remover. The slime remover works wonders on any visible residue left by your favorite gooey substance. It’s even effective at removing slime that’s build up around your home or stuck to your components. Slime Remover is easy to find at local retail stores.
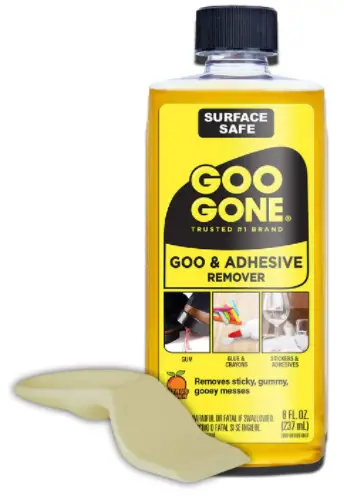
Goo Gone Goo & Adhesive Remover

There are lots of ways to remove slime or any sticky residue from your bike’s rims and tires — but the best way to deal with them is to use a product that will work. We had our doubts about this bottle of Goo Gone Goo & Adhesive Remover because it looked too good — and we were right! It can save you money in the long run by removing those stubborn slimes from your bike’s tires and also making them look new again.
How to remove slime from inside a tire using the slime remover the proper way? Just apply a generous amount of it onto a cotton pad. Carefully wipe off the slime you want to remove from your rims and tires. Repeat if necessary, depending on the thickness of slime.
6. Finish it off with a Degreaser
Now that you’ve gotten the bulk of the mess off, it’s time to get the final traces of slime out. We’re going to use a potent degreaser to clean up. We suggest that you get your hands on the Finish Line Citrus Degreaser. Its orange-based formula makes it safe, eco-friendly, and non-toxic.
Finish Line Citrus Bicycle Degreaser
Because it contains citrus extracts, the Finish Line degreaser has a low pH and acidic nature. It’s great news for rubber and plastic components, as natural acids mean deeper penetration into the surface and increased removal of contaminants like slime residues.
Using a clean, dry cloth and a small amount of degreaser (some use soap and water; others prefer bleach or commercial cleaners), wipe the affected areas thoroughly but gently to completely rid them of any slime residue.
7. Reassemble the Rim and Tire
The last step is to reassemble the rim and the tire back together. This is as simple as pressing down on both components until they snap in place. That’s it! Put your hands together for your new wheels! After all that dirty work comes a really great moment.
Conclusion
That’s everything you need to know on how to remove slime from inside a tire. We hope you learned something new today. Each step was vital to removing slime from your tires, so make sure to keep these in mind when you do this by yourself. And be sure to let us know how it goes — we’d love to hear from you.


